-
-
 Cardiology
-
 Clinical Oncology
-
 Dental
-
 Dermatology
-
 Ear, Nose, Throat (ENT)
-
 Endocrinology
-
 Gastroenterology
-
 General Surgery
-
 Gynecology & Obstetrics
-
 Interventional Cardiology
-
 Nephrology
-
 Neurology
-
 Oncology Surgery
-
 Ophthalmology
-
 Orthopedics
-
 Pediatrics
-
 Pediatrics Surgery
-
 Physiotherapy
-
 Plastic Surgery
-
 Psychiatry & Psychology
-
 Radiology
-
 Urology
-
 Vascular Surgery
-

 Anatomy Lab Equipments
 Biochemistry Lab Equipments
 Biology Lab Equipments
 Chemistry Lab Equipments
 Cytology Lab Equipments
 Cytopathology Lab Equipments
 Dental Lab Equipments
 Forensic Lab Equipments
 Genetics Lab Equipments
 Hematology Lab Equipments
 Histology Lab Equipments
 Histopathology Lab Equipments
 Mathematics Lab Equipments
 Microbiology Lab Equipments
 Molecular Biology Lab Equipments
 Pathology Lab Equipments
 Pharmaceutical Lab Equipments
 Physics Lab Equipments
 Radiology Lab Equipments
 Science Lab Kit’s
 Toxicology Lab Equipments

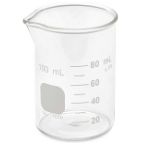
 Borosilicate Glass Beaker
 Plastic Beaker (Euro Design)
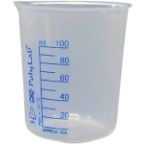
 Plastic Beaker (Printed Graduation)
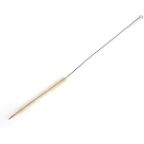
 Test Tube Brush
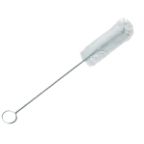
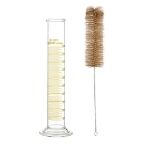 Measuring Cylinder Brush
 Conical Flask Brush
 Volumetric Flask Brush
 Round Bottom Flask Brush
 Glass Beaker Brush
 Pipette Brush
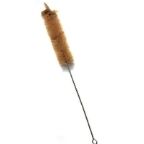 Wash Bottle Brush
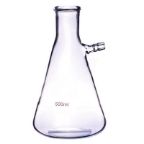
 Borosilicate Büchner Flask
 Borosilicate Erlenmeyer/Conical Flask
 Borosilicate Pear-Shaped Flask
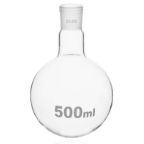 Borosilicate Round Bottom Flask
 Plastic Conical Flask
 Plastic Volumetric Flask
 Bunsen Burner
 Spirit Lamp
 Borosilicate Glass Burette
 Plastic Burette
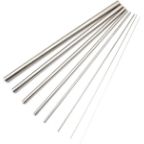 Capillary Tube
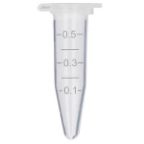 Centrifuge Tube
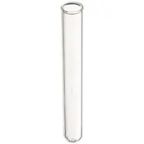 Test Tube
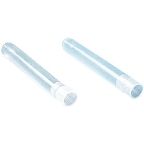 Ria Vial
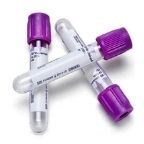
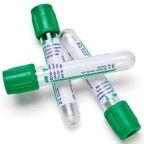 Vacutainer Tubes
 Syringes
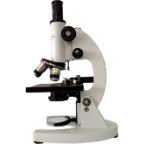 Student Microscope
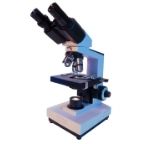 Binocular Microscope
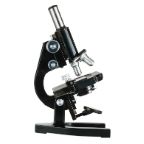 Dissecting Microscope
 Microscope Glass Slides
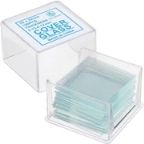 Cover Slip
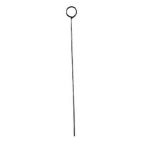 Inoculating Loop
 Slide Box
 Lamps
Lamps
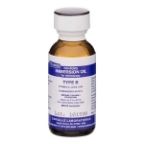 Oils
Oils
 Beaker Tongs
 Crucible Tongs
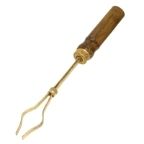
 Flask Tongs
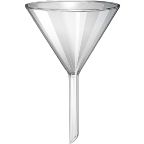
 Borosilicate Glass Funnel
 Plastic Funnels
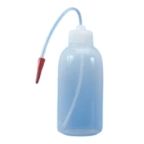
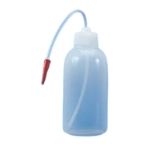 Wash Bottle
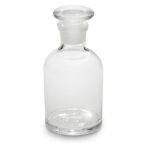 Borosilicate Glass Reagent Bottle
 Plastic Reagent Bottle
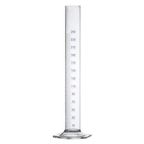 Borosilicate Measuring Cylinder
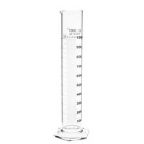 Plastic Measuring Cylinder
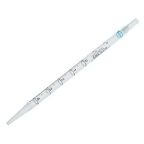
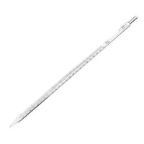 Borosilicate Glass Graduated Pipette
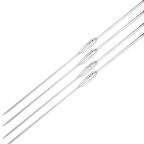
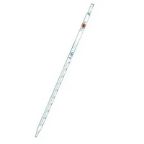 Borosilicate Glass Volumetric Pipette
 HB Pipette
 Pasteur Pipette
 Micropipettes
 Micropipette Tips
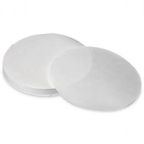 Filter Paper
 Litmus Paper
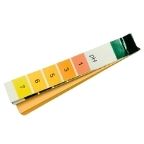 pH Paper
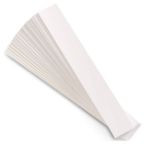 Chromatography Paper
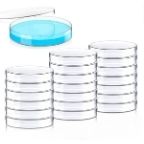 Plastic Petri Plates (Sterile)
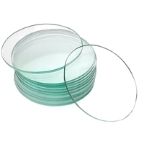
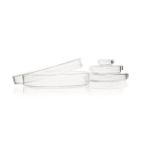 Glass Petri Plates (Non-Sterile)
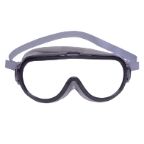 Safety Goggles
 Lab Coats
 Gloves
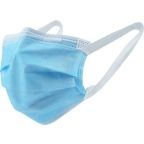 Masks
Masks
 Shoe Covers
 Hair & Beard Covers
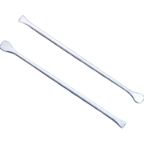
 Steel Spatula
 Plastic Spatula
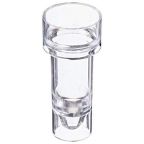 Hitachi Sample Cup
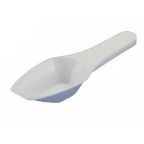 Plastic Scoop
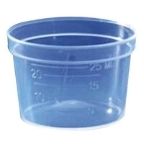 Plastic Medicine Cup
 Dissecting Tool Kit
 Dissecting Forceps
 Hemostatic Forceps
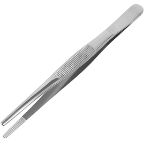
 Thumb Forceps / Tweezers
 Blood Culture Bottle
 Urine Container
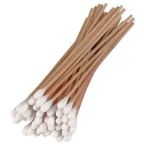 Wooden Swab Stick
 Test Tube Holder
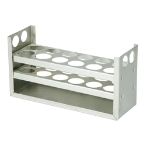 Test Tube Racks
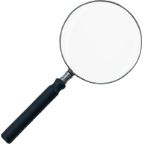 Magnifying Glass
 Watch Glass
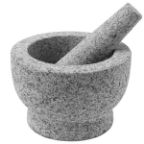 Mortar and Pestle
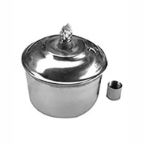
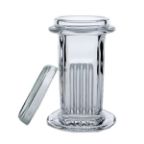 Coplin Jar
 Plastic Stirrer
 Glass Stirrer
 Crucible
 Tripod
 Wire Mesh
 Laboratory Thermometer
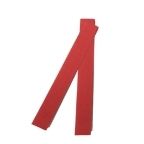
 Tourniquet
 Alcohol Swab
 Blood Lancet
 Bandage
 Gloves & Masks


18 Mind-Blowing Ideas for Class 6 Science Projects
Contents
- List of Class 6 Science Projects
- 1. Pull an egg into the bottle
- 2. Design a Biodome
- 3. Generate Electricity with Potato
- 4. Dissect owl pellet
- 5. Construct a Pair of Model Lungs
- 6. Build Heart Pump Model
- 7. Learn inertia with fidget spinner
- 8. Perform Archimedes squeeze
- 9. Build a mobile stand
- 10. Turn Milk into Plastic
- 11. Change liquid color instantly
- 12. Assemble Steady hand game
- 13. Launch Two-Stage Rocket Experiment in School Lab
- 14. Send Water Down with String
- 15. Make Naked Eggs
- 16. Assemble a Simple Motor
- 17. Build Paper Plane Launcher
- 18. Build Ferris Wheel in Lab
It’s that time of year again—when students are gearing up for the science fair. And if you’re looking for some inspiration, look no further!
In this blog post, we will explore 18 mind-blowing ideas for class 6 science projects that will get those gears turning. So without further ado, let’s get started!
List of Class 6 Science Projects
- Pull an egg into the bottle
- Design a Biodome
- Generate Electricity with Potato
- Dissect owl pellet
- Construct a Pair of Model Lungs
- Build Heart Pump Model
- Learn inertia with fidget spinner
- Perform Archimedes squeeze
- Build a mobile stand
- Turn Milk into Plastic
- Change liquid color instantly
- Assemble Steady hand game
- Launch Two-Stage Rocket
- Send Water Down with String
- Make Naked Eggs
- Assemble a Simple Motor
- Build Paper Plane Launcher
- Ferris Wheel
1. Pull an egg into the bottle
Here’s a fun science project that you can do at home! All you need is:
- A hard-boiled egg
- A glass bottle with a narrow neck.
Place the egg on top of the bottle opening and gently apply pressure to push it down into the bottle. The egg will start to descend into the bottle, but then it will get stuck.
Now, use your mouth to create suction on the bottle. This will cause the air pressure inside the bottle to decrease, which will allow the egg to be pulled further down into the bottle.
Keep applying suction until the egg is completely inside the bottle. Now wasn’t that cool?
2. Design a Biodome
Planning to design a biodome for class 6 science project is a great way to learn about ecosystems and the environment. By creating a miniature version of a natural ecosystem, you can observe how different plants and animals interact with each other.
This project is perfect for any science class, including biology, ecology, and Earth science. With careful planning, you can create a detailed and fascinating project that will teach you about ecosystems while also providing a fun way to learn about the natural world.
3. Generate Electricity with Potato
Potatoes are a great source of energy and can be used to generate electricity. There are many ways to do this, but one of the most popular is to use a potato battery. This is a simple science project that anyone can do at home with a few inexpensive materials.
To make a potato battery, you will need:
- One potato
- Two metal screws
- One alligator clip lead
- One piece of copper wire
- One zinc nail
Start by poking the two metal screws into opposite ends of the potato. Then, take the alligator clip lead and attach it to one of the screws. Next, take the copper wire and wrap it around the other screw. Finally, take the zinc nail and insert it into the potato so that it touches the copper wire.
That’s it! Your potato battery is now complete. To test your battery, simply touch the free end of the alligator clip lead to the zinc nail.
4. Dissect owl pellet
Owls are amazing predators that can take down prey much larger than themselves. One of the ways they do this is by swallowing their prey whole and then regurgitating the indigestible parts in the form of a pellet. These pellets are great for science projects because they contain all the bones and fur of the owl’s prey.
To dissect an owl pellet, start by breaking it open with your hands or a tool like a screwdriver. Once you have access to the contents, sort through them to find any bones or teeth. These can be studied to identify what kind of animal the owl ate. The fur can also be examined to determine what kind of animal it came from.
5. Construct a Pair of Model Lungs
To construct a pair of model lungs, you will need:
- 2 clear plastic soda bottles
- A pen or marker
- Scissors
- Tape
- A straw
- Construction paper
- Glue
Cut the bottom off of both soda bottles. On one bottle, use the pen or marker to draw a line around the middle. Cut along this line. Repeat step 2 on the other bottle. Now, take one of the halves of a bottle without a top and tape a straw to the side. This will be your “inhale” tube. Do the same with the other half of bottle, but tape the straw to the opposite side – this will be your “exhale” tube.
Place both halves back together, matching up the sides without straws. Tape them together at the seam. Cut out two lung shapes from construction paper using scissors. Glue these onto either side of your model lungs (opposite of where the tubes are taped on).
6. Build Heart Pump Model
To build a heart pump model, you will need the following materials:
- 1 empty plastic water bottle
- 1 small balloon
- Scissors
- Tape
- Marker
Cut the bottom off of the plastic water bottle. Stretch the small balloon over the opening of the bottle. Secure it in place with tape. Use the marker to draw a heart on the balloon. Cut a small hole in the center of the heart. Blow up the balloon through the hole until it is about half full.
Tie off the end of the balloon to keep the air inside. Turn the bottle upside down and hold it in one hand. With your other hand, gently squeeze and release the balloon to make the “heart” pump!
7. Learn inertia with fidget spinner
Fidget spinners are a great way to help kids learn about inertia! When you spin a fidget spinner, you are actually using inertia to keep it going. The more mass an object has, the more inertia it has. That’s why it’s important to use a heavier fidget spinner if you want it to spin for a long time.
There are lots of other fun science experiments you can do with fidget spinners too! Try testing how long different types of fidget spinners will spin for, or see how far you can make one fly when you throw it. There are endless possibilities for fun and learning with fidget spinners!
8. Perform Archimedes squeeze
If you want to amaze your classmates with a truly mind-blowing science project, try the Archimedes squeeze. This simple experiment demonstrates the power of air pressure. All you need is a large container of water and a small object that will float in water.
To start, fill the container with water and place the object floating on top. Then, take a deep breath and blow into the container while keeping your mouth open wide. The object should be forced down into the water by the force of your breath.
Now take your thumb and finger and make a seal around the neck of the container. Then, quickly remove your hand from the neck of the container. The seal should hold and the object should be forced up out of the water and into the air!
The Archimedes squeeze is a great way to amaze your friends and classmates with the power of air pressure. Try it today!
9. Build a mobile stand
When it comes to building a mobile stand, there are a few things you’ll need to take into account. First, you’ll need to decide what type of stand you want to build. There are two main types of mobile stands: those that sit on a table or desk, and those that can be mounted to a wall.
If you’re opting for a table or desk-based stand, you’ll have to make sure that the stand is stable and won’t tip over easily. You’ll also want to consider how easy it will be to move the stand around; something with wheels may be ideal in this case.
For a wall-mounted stand, you’ll have to make sure that the mount is secure and won’t come loose easily. You’ll also want to consider how easy it will be to access your phone while it’s mounted; something with a swing arm may be ideal. Once you’ve decided on the type of stand you want to build, gather your materials and get started!
10. Turn Milk into Plastic
To perform this class 6 science project, collect some milk from the grocery store. You will need about two cups.
Pour the milk into a saucepan and heat it over low heat until it becomes lukewarm. Do not let the milk boil. Next, add one tablespoon of vinegar to the milk and stir gently. Continue stirring until all the liquid has turned into small clumps.
Strain the curds from the whey by lining a colander with cheesecloth and place it over a bowl. Pour the curdled milk into the colander and allow it to drain for about an hour. The whey will drip into the bowl below while the curds remain in the colander.
Then, transfer the curds to a clean piece of cheesecloth and squeeze out any remaining liquid. You should now have a ball of wet, white cheese in your cheesecloth.
Congratulations, you have just made ricotta cheese! To turn ricotta cheese into plastic, remove the water from the cheese. For this, place the cheesecloth bundle in a colander and set it over a bowl. Put a lid on the colander and place it in the fridge. Let it sit overnight so that the water can drain out of the cheese.
In the morning, you should have a dry, crumbly ricotta cheese. Congratulations, you’ve made plastic!
11. Change liquid color instantly
If you want to change the color of a liquid instantly, all you need is:
- Some food coloring
- A clear container.
Fill the container with the liquid you would like to change, then add a few drops of food coloring. The more food coloring you add, the darker the color will be. Stir the mixture until the color is evenly distributed, then enjoy your new creation!
12. Assemble Steady hand game
Assuming you have all the necessary materials, assembling a steady hand game is a relatively simple process.
The first step is to put the baseplate on a flat surface. Then, take the two metal rods and insert them into the holes on either side of the baseplate.
Next, take the plastic ball and place it on top of the metal rods. Finally, put the cover over the ball and secure it in place with the screws.
13. Launch Two-Stage Rocket Experiment in School Lab
For this class 6 science project, you will need:
- Two identical rockets
- A launchpad and
- Fuel.
Place the rockets on the launchpad side by side. Fill one rocket with fuel and ignite it.
As the first rocket takes off, simultaneously launch the second rocket. Observe and record the results of your experiment.
14. Send Water Down with String
If you’re looking for a really fun and unique science project, try sending water down with string! This project is perfect for kids of all ages and can be done with materials you probably already have around the house.
Here’s what you’ll need:
- A clear plastic cup
- A piece of string or yarn
- Water
- Tape
- Scissors
To get started, fill your cup with water and tie the string around the top. Make sure the string is long enough that it hangs over the edge of the cup. Next, use the tape to secure the string in place. Now, carefully turn the cup upside down and watch as the water slowly flows down the string!
This project is a great way to learn about gravity and how it affects liquids. Plus, it’s just plain fun to watch!
15. Make Naked Eggs
You can make a naked egg by removing the shell without breaking the egg. It’s a neat science trick that you can do at home with just a few supplies.
Here’s what you’ll need:
- 1 egg
- 1/2 cup white vinegar
- 1/2 cup water
- A glass or container that the egg can fit in snugly
Start by putting the egg in the vinegar and water solution. Make sure that the entire egg is covered by the liquid. Let the egg sit in the solution for 24 hours.
After 24 hours, remove the egg from the solution and Rinse it off with water. Gently rub the egg to remove any leftover bits of shell. The egg is now naked! You can try blowing it up like a balloon, or bouncing it on the floor (it won’t break!).
16. Assemble a Simple Motor
You will need:
- A small DC motor
- One AA battery
- A small piece of cardboard
- A thumbtack or pushpin
- Some insulated wire (about 18 inches)
- Tape (any kind will do)
Begin by taping the AA battery to the piece of cardboard. Then, use the thumbtack or pushpin to make a hole in the top of the battery. Cut a small slit in the cardboard, next to the hole you just made. This is where your wires will go.
Strip about ½ inch of insulation off each end of your wire. Feed one end of the wire through the slit in the cardboard and twist it around the positive (longer) lead of the motor.
Do the same with the other end of the wire, but twist it around the negative (shorter) lead of the motor instead. Finally, put a drop of glue or some tape over each connection to keep them from slipping apart.
That’s it! When you connect your battery to the leads on your motor, it should spin!
17. Build Paper Plane Launcher
To build a paper plane launcher, you will need:
- A popsicle stick
- A rubber band
- A paperclip
- Tape
First, take the popsicle stick and tape the rubber band to it. Then, take the paperclip and bend it so that it forms a hook. Tape the paperclip to the other end of the popsicle stick. Your paper plane launcher is now complete!
To use it, simply put a paper plane on the hook and pull back on the rubber band. Let go and watch your plane fly!
18. Build Ferris Wheel in Lab
If you’re looking for an unforgettable science project, why not try building a Ferris wheel? This project is perfect for budding engineers of all ages. Plus, it’s a great way to learn about physics and how energy can be used to create motion.
Here’s what you’ll need:
- A large piece of cardboard
- A ruler or measuring tape
- A pencil
- Scissors
- Glue or tape
- String or yarn
- A small weight (a paperclip or coin will work)
Cut out a large circle from the cardboard. This will be the base of your Ferris wheel. Using the ruler or measuring tape, mark out eight evenly spaced points around the edge of the circle. These will be the locations for your Ferris wheel supports.
Cut eight strips of cardboard, each about 4 inches long. Glue or tape each support strip to the base at the marked points. Make sure that the supports are standing up straight.
Tie string around each support, about 2 inches from the top. The string should be long enough to reach the ground when your Ferris wheel is complete. 6. Tie the other end of each string to a small weight (a paperclip or coin). This will help keep your Ferris wheel upright when it’s spinning.
 Cardiology
 Clinical Oncology