-
-
 Cardiology
-
 Clinical Oncology
-
 Dental
-
 Dermatology
-
 Ear, Nose, Throat (ENT)
-
 Endocrinology
-
 Gastroenterology
-
 General Surgery
-
 Gynecology & Obstetrics
-
 Interventional Cardiology
-
 Nephrology
-
 Neurology
-
 Oncology Surgery
-
 Ophthalmology
-
 Orthopedics
-
 Pediatrics
-
 Pediatrics Surgery
-
 Physiotherapy
-
 Plastic Surgery
-
 Psychiatry & Psychology
-
 Radiology
-
 Urology
-
 Vascular Surgery
-

 Anatomy Lab Equipments
 Biochemistry Lab Equipments
 Biology Lab Equipments
 Chemistry Lab Equipments
 Cytology Lab Equipments
 Cytopathology Lab Equipments
 Dental Lab Equipments
 Forensic Lab Equipments
 Genetics Lab Equipments
 Hematology Lab Equipments
 Histology Lab Equipments
 Histopathology Lab Equipments
 Mathematics Lab Equipments
 Microbiology Lab Equipments
 Molecular Biology Lab Equipments
 Pathology Lab Equipments
 Pharmaceutical Lab Equipments
 Physics Lab Equipments
 Radiology Lab Equipments
 Science Lab Kit’s
 Toxicology Lab Equipments

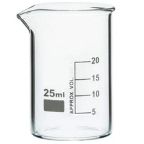 Borosilicate Glass Beaker
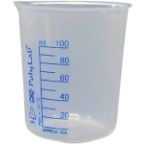 Plastic Beaker (Euro Design)
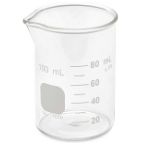 Plastic Beaker (Printed Graduation)
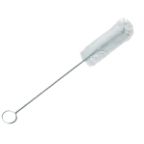 Test Tube Brush
 Measuring Cylinder Brush
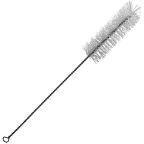
 Conical Flask Brush
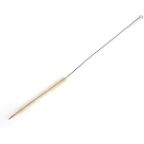
 Volumetric Flask Brush
 Round Bottom Flask Brush
 Glass Beaker Brush
 Pipette Brush
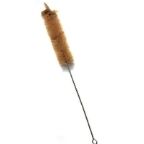 Wash Bottle Brush
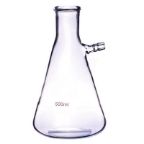
 Borosilicate Büchner Flask
 Borosilicate Erlenmeyer/Conical Flask
 Borosilicate Pear-Shaped Flask
 Borosilicate Round Bottom Flask
 Plastic Conical Flask
 Plastic Volumetric Flask
 Bunsen Burner
 Spirit Lamp
 Borosilicate Glass Burette
 Plastic Burette
 Capillary Tube
 Centrifuge Tube
 Test Tube
 Ria Vial
 Vacutainer Tubes
 Syringes
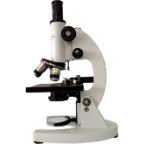 Student Microscope
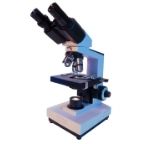 Binocular Microscope
 Dissecting Microscope
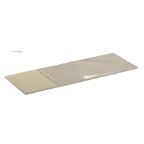 Microscope Glass Slides
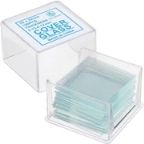 Cover Slip
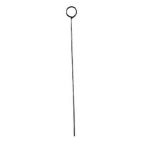 Inoculating Loop
 Slide Box
 Lamps
Lamps
 Oils
Oils
 Beaker Tongs
 Crucible Tongs
 Flask Tongs
 Borosilicate Glass Funnel
 Plastic Funnels
 Wash Bottle
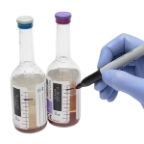
 Borosilicate Glass Reagent Bottle
 Plastic Reagent Bottle
 Borosilicate Measuring Cylinder
 Plastic Measuring Cylinder
 Borosilicate Glass Graduated Pipette
 Borosilicate Glass Volumetric Pipette
 HB Pipette
 Pasteur Pipette
 Micropipettes
 Micropipette Tips
 Filter Paper
 Litmus Paper
 pH Paper
 Chromatography Paper
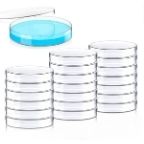 Plastic Petri Plates (Sterile)
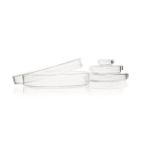 Glass Petri Plates (Non-Sterile)
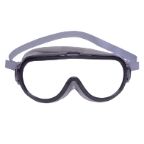 Safety Goggles
 Lab Coats
 Gloves
 Masks
Masks
 Shoe Covers
 Hair & Beard Covers
 Steel Spatula
 Plastic Spatula
 Hitachi Sample Cup
 Plastic Scoop
 Plastic Medicine Cup
 Dissecting Tool Kit
 Dissecting Forceps
 Hemostatic Forceps
 Thumb Forceps / Tweezers
 Blood Culture Bottle
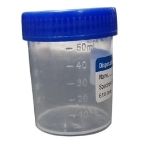 Urine Container
 Wooden Swab Stick
 Test Tube Holder
 Test Tube Racks
 Magnifying Glass
 Watch Glass
 Mortar and Pestle
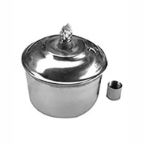
 Coplin Jar
 Plastic Stirrer
 Glass Stirrer
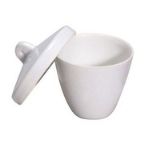 Crucible
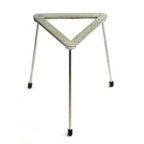 Tripod
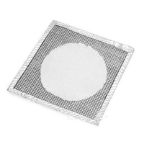 Wire Mesh
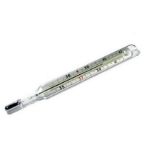 Laboratory Thermometer
 Tourniquet
 Alcohol Swab
 Blood Lancet
 Bandage
 Gloves & Masks


10 Easy Class 4 Science Projects for Exhibitions
Contents
School science fairs are a great way to get students interested in science and to showcase their talents. But sometimes, it can be hard to come up with ideas for projects that are both interesting and easy to do. Here are 10 easy class 4 science projects for exhibitions that are sure to be a hit with both students and teachers alike! From exploring the effects of different types of light on plant growth to testing the strength of various materials, these projects are fun, easy, and perfect for any science fair.
List of 10 Easy Class 4 Science Projects
There are many easy class 4 science projects that can be used for exhibitions. Most of these science projects focus on the basic concepts of science, such as the properties of matter, the formation of the universe, and the laws of motion. However, there are also a few more unique science projects that can be used to show off your child’s creativity and scientific knowledge.
- Homemade Lava Lamp
- Grow Bacteria in Petri Dishes
- Osmosis
- Helmet Crash Test
- Build a Paper Bridge
- Use a Peanut’s Energy to Heat Water
- Oil Spill Experiment
- Make Your Own Microscope with water
- Flashlight Creation
- Earthquake Simulation
Homemade Lava Lamp
A lava lamp is a fun and easy science project that you can make at home with just a few supplies. All you need is:
- A clear bottle
- Some vegetable oil
- Water
- Food coloring, and
- An Alka-Seltzer tablet.
To make your lava lamp, first add the oil and water to the bottle in a ratio of 1:1. Then add a couple of drops of food coloring to the mixture. Next, drop in an Alka-Seltzer tablet and watch as the mixture reacts and the “lava” starts to flow!
Grow Bacteria in Petri Dishes
To grow bacteria in petri dishes, you will need:
- Agar powder
- Water
- Petri dishes
- Sterile cotton swabs
Begin by sterilizing your work area and all of your supplies. You can do this by wiping everything down with rubbing alcohol. Next, make up a batch of agar according to the directions on the package.
Pour the agar into the petri dishes, and then place them in a warm spot to solidify. Once the agar has solidified, you can introduce the bacteria to the dish. You can do this by either streaking a sterile cotton swab across an existing culture of bacteria, or by placing a small piece of bacterial growth onto the agar.
Place the Petra dishes in an incubator set at the appropriate temperature for your bacteria to grow. Check on them daily, and soon you will see colonies of bacteria growing on the agar!
Osmosis
Osmosis is a process that happens naturally in living things. It’s the movement of water through a semipermeable membrane from an area of high water concentration to an area of low water concentration. This process can be easily demonstrated with a few household materials.
To demonstrate osmosis, you will need:
- A clear plastic cup
- Two tablespoons of salt
- Water
- Paper towels
- A marker
Fill the cup with water and stir in the salt until it is dissolved. Wet a paper towel and ring it out so that it is damp but not dripping wet. Place the damp paper towel on one side of the cup and use the marker to make a line on the paper towel where it meets the cup. This will be your control line.
Fill a second cup with fresh water. Wet another paper towel and ring it out like before. Place this paper towel on the other side of the cup and use the marker to make a line where it meets the cup. This will be your experimental line. Check back in an hour to see what has happened!
Helmet Crash Test
As part of an easy class science project, students can create a simple crash test for a helmet. The purpose of the crash test is to determine how well the helmet protects the head in a simulated fall.
To conduct the crash test, students will need:
- A dummy head (which can be created from a balloon and Styrofoam)
- A helmet and
- A high place from which to drop the head (such as a second story window).
The head should be dropped from a height of at least 10 feet, and ideally 15-20 feet. Once the head is dropped, students can observe how well the helmet protected the head and make conclusions about whether the helmet did its job. This project can be repeated with different types of helmets (bike, skateboard, ski, etc.) to compare their efficacy.
Build a Paper Bridge
Building a paper bridge is one of the oldest and most popular science projects for exhibitions. It is a simple project that can be completed in a short period of time, and it is an excellent way to showcase the strength and versatility of paper as a construction material.
Suspension bridges are the simplest type of paper bridge, and they are often used as introductory science projects for young students. For a suspension bridge, you will need:
- Two lengths of string or fishing line
- Two pieces of card stock or construction paper
- Tape
- Scissors, and
- Stapler
Once you have your materials assembled, you can start building your bridge. If you are building a suspension bridge, begin by attaching one length of string to each piece of card stock. Next, use tape to attach the two pieces of card stock together at the center point. Finally, use the stapler to attach the two ends of the bridge to the string.
Once your bridge is complete, it is time to test it! Suspension bridges are typically tested by suspending a weight from the center of the bridge and observing how much weight the bridge can hold before breaking. With a little practice, you should be able to build a paper bridge that can support quite a bit of weight!
Use a Peanut’s Energy to Heat Water
A peanut contains a lot of energy. You can use this energy to heat water. All you need is:
- A container of water
- A peanut and
- A match
First, light the peanut on fire using the match. Hold the burning peanut over the container of water. The heat from the burning peanut will transfer to the water and cause it to boil. You can use this same method to heat other liquids like milk or soup. Just be careful not to burn yourself!
Oil Spill Experiment
Oil spills are a big problem in the world. They happen when boats carrying oil spill it into the water. The oil pollutes the water and harms animals. There are many experiments you can do to learn about oil spills. One is to make your own oil spill. You will need:
- A container of water
- A cup of vegetable oil
- A drop of dish soap
Pour the water into the container. Add the vegetable oil and stir gently. Then add the dish soap and watch what happens!
Make Your Own Microscope with water
To make this class 4 science project, you will need:
- A clean, clear jar
- A magnifying glass
- Water
- Tape
Fill the jar with water. Make sure there are no air bubbles. Place the magnifying glass on top of the jar, and secure it with tape. Hold the microscope up to your eye, and look through the magnifying glass at objects in your environment.
Flashlight Creation
There are many ways to create a flashlight. One way is to use:
- A battery
- Some wires and
- A light bulb.
First, you will need to gather your materials. For this project, you will need a battery, some wires, and a light bulb. You will also need something to hold the light bulb in place. This can be anything from a paper cup to a piece of cardboard with a hole cut in it.
Next, you will need to attach the wires to the battery. Make sure that the positive (red) wire is attached to the positive side of the battery, and the negative (black) wire is attached to the negative side of the battery. Once the wires are attached, screw the light bulb into the holder.
Now your flashlight is complete! You can turn it on by flicking the switch on the battery. Remember to turn it off when you’re done so that you don’t waste any power.
Earthquake Simulation
If you live in an area that is prone to earthquakes, it is important to be prepared. A good way to do this is to create an earthquake simulation. This can be done with a few simple supplies.
For this experiment, you will need:
- A large container
- A tub
- A bin, or even a cardboard box.
- Sand or soil.
Next, fill the container with sand or soil. The amount will depend on the size of your container. Once the container is filled, add some small rocks or pebbles. These will represent the debris that can be found after an earthquake.
Now it’s time to create the earthquake! To achieve this, take a large spoon and vigorously stir the sand or soil. Be sure to do this for at least 30 seconds so that the mixture is well mixed. You may also want to add some water to make it more realistic.
After you have created your earthquake mixture, it’s time to simulate the shaking! To achieve this, simply place your container on a flat surface and gently shake it back and forth. You can also use a vibrating object such as an electric toothbrush placed under the container to create the shaking motion.
Once you have finished shaking the container, observe how the rocks and debris have moved around inside. This will give you an idea of what could happen during an actual earthquake.
Final Words
As the school year comes to an end, it’s time to start thinking about science fair projects. If you’re looking for an easy project that will wow the judges, look no further! Here are three easy class science projects that are sure to impress.
With these 10 easy Class 4 science projects for exhibitions, your child is sure to make a splash at their next school event. These simple but effective science projects are perfect for getting kids interested in science, and they’re bound to impress everyone who sees them.
So get started on one of these fun science projects today and see just how much your child can achieve.
 Cardiology
 Clinical Oncology