-
-
 Cardiology
-
 Clinical Oncology
-
 Dental
-
 Dermatology
-
 Ear, Nose, Throat (ENT)
-
 Endocrinology
-
 Gastroenterology
-
 General Surgery
-
 Gynecology & Obstetrics
-
 Interventional Cardiology
-
 Nephrology
-
 Neurology
-
 Oncology Surgery
-
 Ophthalmology
-
 Orthopedics
-
 Pediatrics
-
 Pediatrics Surgery
-
 Physiotherapy
-
 Plastic Surgery
-
 Psychiatry & Psychology
-
 Radiology
-
 Urology
-
 Vascular Surgery
-

 Anatomy Lab Equipments
 Biochemistry Lab Equipments
 Biology Lab Equipments
 Chemistry Lab Equipments
 Cytology Lab Equipments
 Cytopathology Lab Equipments
 Dental Lab Equipments
 Forensic Lab Equipments
 Genetics Lab Equipments
 Hematology Lab Equipments
 Histology Lab Equipments
 Histopathology Lab Equipments
 Mathematics Lab Equipments
 Microbiology Lab Equipments
 Molecular Biology Lab Equipments
 Pathology Lab Equipments
 Pharmaceutical Lab Equipments
 Physics Lab Equipments
 Radiology Lab Equipments
 Science Lab Kit’s
 Toxicology Lab Equipments

 Borosilicate Glass Beaker
 Plastic Beaker (Euro Design)
 Plastic Beaker (Printed Graduation)
 Test Tube Brush
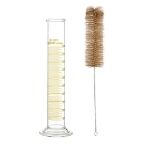 Measuring Cylinder Brush
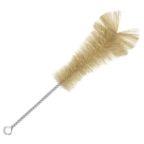 Conical Flask Brush
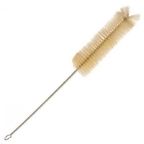
 Volumetric Flask Brush
 Round Bottom Flask Brush
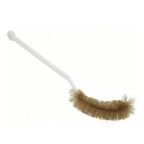
 Glass Beaker Brush
 Pipette Brush
 Wash Bottle Brush
 Borosilicate Büchner Flask
 Borosilicate Erlenmeyer/Conical Flask
 Borosilicate Pear-Shaped Flask
 Borosilicate Round Bottom Flask
 Plastic Conical Flask
 Plastic Volumetric Flask
 Bunsen Burner
 Spirit Lamp
 Borosilicate Glass Burette
 Plastic Burette
 Capillary Tube
 Centrifuge Tube
 Test Tube
 Ria Vial
 Vacutainer Tubes
 Syringes
 Student Microscope
 Binocular Microscope
 Dissecting Microscope
 Microscope Glass Slides
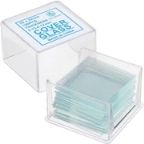 Cover Slip
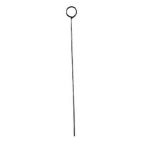 Inoculating Loop
 Slide Box
 Lamps
Lamps
 Oils
Oils
 Beaker Tongs
 Crucible Tongs
 Flask Tongs
 Borosilicate Glass Funnel
 Plastic Funnels
 Wash Bottle
 Borosilicate Glass Reagent Bottle
 Plastic Reagent Bottle
 Borosilicate Measuring Cylinder
 Plastic Measuring Cylinder
 Borosilicate Glass Graduated Pipette
 Borosilicate Glass Volumetric Pipette
 HB Pipette
 Pasteur Pipette
 Micropipettes
 Micropipette Tips
 Filter Paper
 Litmus Paper
 pH Paper
 Chromatography Paper
 Plastic Petri Plates (Sterile)
 Glass Petri Plates (Non-Sterile)
 Safety Goggles
 Lab Coats
 Gloves
 Masks
Masks
 Shoe Covers
 Hair & Beard Covers
 Steel Spatula
 Plastic Spatula
 Hitachi Sample Cup
 Plastic Scoop
 Plastic Medicine Cup
 Dissecting Tool Kit
 Dissecting Forceps
 Hemostatic Forceps
 Thumb Forceps / Tweezers
 Blood Culture Bottle
 Urine Container
 Wooden Swab Stick
 Test Tube Holder
 Test Tube Racks
 Magnifying Glass
 Watch Glass
 Mortar and Pestle
 Coplin Jar
 Plastic Stirrer
 Glass Stirrer
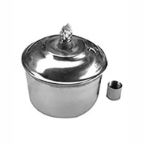
 Crucible
 Tripod
 Wire Mesh
 Laboratory Thermometer
 Tourniquet
 Alcohol Swab
 Blood Lancet
 Bandage
 Gloves & Masks


25 Awesome topic ideas for class 7 Science projects
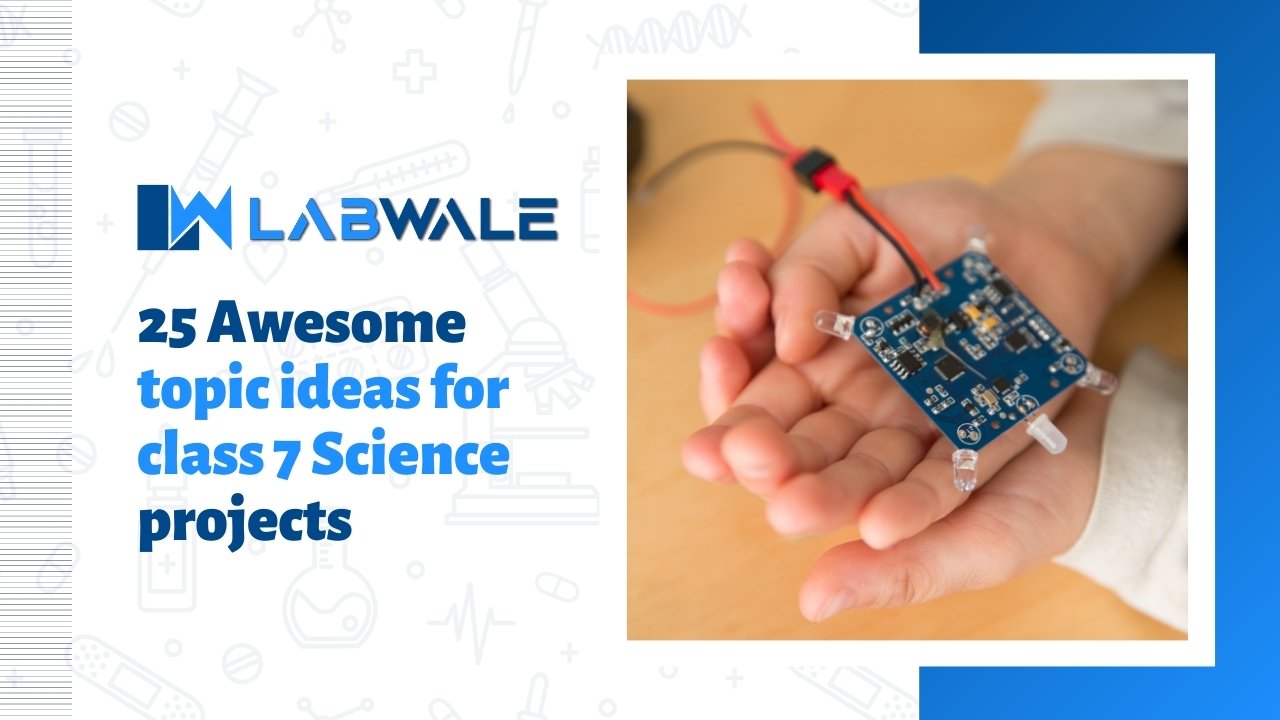
If you’re looking for some great ideas for class science projects, you’ve come to the right place! In this article, we’ll give you some tips on how to choose a project that’s both interesting and educational.
We know that coming up with science project ideas can be tough, so we’ve compiled a list of some awesome ideas to get you started. Whether you’re interested in studying the stars or investigating the properties of matter, there’s a project here for you!
Remember, the best projects are those that are both fun and informative. So take your time in choosing a topic, and make sure to consult your teacher before getting started. With these guidelines in mind, you’re sure to create a masterpiece!
Class 7 Science Projects
There are a number of really great ideas for class 7 science projects. These can be done with just a few laboratory items and a little bit of knowledge about how circuits work. These are the fun project that can be done over the course of a few weeks.
1. Swing a Glass of Water
A glass of water is a great way to get started with your science project. Not only is it an easy and inexpensive way to get started, but you can also use it to learn about the properties of water and how they change when different substances are added to it.
You can also use it to study the effects of temperature on water and how different liquids mix together.
2. Exploration of Swim Bladders
When it comes to exploring the science behind swim bladders, there are a few key things to keep in mind.
First, swim bladders are gas-filled sacs that help fish maintain their buoyancy.
Second, the size and shape of a fish’s swim bladder can vary depending on the species.
And lastly, there is some evidence to suggest that fish with swim bladders may be able to sense changes in water pressure and temperature.
3. Blow hot or cold bubbles
Bubbles are always a hit with kids, so why not incorporate them into a science project?
There are two ways to blow bubbles – with hot air or cold air. Try both methods and see which one produces bigger bubbles.
You can also experiment with different types of soap to see which one makes the strongest bubbles.
4. Spin Bey blades to explore angular momentum
If you’re looking for a fun and engaging way to learn about angular momentum, then look no further than Beyblade spinning toys. By spinning a Beyblade around its axis, students can observe firsthand how angular momentum affects an object in motion.
You can also experiment with different blade shapes and sizes to see how they affect the toy’s spin.
5. Play around with oxidation
There are many different types of oxidation that can be explored through class 7 science projects. One example is rust, which is the oxidation of iron.
This can be explored by testing different methods of preventing rust, such as painting or coating iron in a protective layer.
Other types of oxidation include the fading of colors and the decomposition of materials. These processes can be accelerated and monitored through experiments.
6. Generate electricity science
Generating electricity is a process of converting one form of energy into another. In this science experiment, we will be using our bodies to generate electricity.
First, we will take one of the alligator clip wires and attach it to the positive side of the battery.
Then, we will take the other alligator clip wire and attach it to the negative side of the battery. Finally, we will touch the two wires together, which will cause the light bulb to light up!
This experiment is a great way to learn about how electricity is generated and used in our everyday lives.
7. Create a taxonomy system
When creating a taxonomy system for a class 7 science project, it is important to consider what information will be most useful for the project.
For example, if the focus of the project is on plants, then including information on kingdom and phylum would be most helpful.
If the focus of the project is on animals, then including information on class and order would be most helpful.
Once you have decided what information will be most useful for the project, you can begin creating your taxonomy system.
8. Build a da Vinci bridge
In this project, students will learn about the engineering principles used by Leonardo da Vinci to design his famous bridge. They will then use these same principles to build their own bridges out of popsicle sticks and glue.
This is a great project for teaching the basics of engineering and physics.
Students will use popsicle sticks and glue to build a replica of the famous da Vinci bridge.
This project is perfect for students who are interested in engineering and architecture. In addition to being a fun and engaging class 7 science project, this experiment will also teach students about the science of bridges.
9. Design a pinball machine
A pinball machine is a great way to teach the scientific method to kids. With this experiment, they will learn how to design and build a simple pinball machine. They will also learn about the physics of motion and energy.
First, cut a hole in the cardboard. This will be the starting point for your ball. Next, tape three paper cups upside down on the cardboard. These will be your targets. Finally, cut a small slit in the bottom of each cup. The ball will fall through these slits when hit.
Now it’s time to test your machine! Drop the ball from the top of the cardboard and see how it does. Does it hit all the targets? Does it go off the edge of the cardboard? Make adjustments until you are happy with your design.
10. Learn whether color affects memory
Color has been shown to affect memory in a variety of ways.
For instance, one study found that participants were better able to remember words that were presented in red font if the words had a positive connotation (e.g., love, happy), but they were better able to remember words that were presented in blue font if the words had a negative connotation (e.g., sad, evil).
These findings suggest that color can influence memory by affecting how we process and encode information.
Therefore, if you’re working on a class 7 science project about memory, you may want to experiment with different colors to see how they impact memory recall.
11. Collect and control biofilm
To collect and control biofilm, students will need to understand what it is and how it forms. A biofilm is a slimy substance that contains bacteria, fungi, and other microorganisms. It can form on wet surfaces, such as in pipes or on teeth.
To control biofilm, students will need to learn about the different methods of cleaning and disinfecting surfaces.
They will also have to understand how biofilm can be used to benefit humans, such as in the production of certain medications or in the treatment of sewage.
12. Tinker around with hydraulic power
If you’re looking for some ideas for your next class 7 science projects, why not try a hydraulic power experiment?
Hydraulic power is the force that is generated when water is under pressure. By using this force, we can do things like lift heavy objects or move vehicles. In this experiment, you will be using hydraulic power to move a small object.
Fill your container with water and add a few drops of food coloring if you like. Place your object in the center of the container.
Make sure that the top of the object is level with the water line.
Now, apply pressure to one side of the container with your hand. You should see the object start to move!
Try different amounts of pressure to see how it affects the speed of movement. Can you make the object move faster or slower?
13. Swab and test for germs
There are many ways to test for the presence of germs, but one of the most common is to swab an area and then test the swab for bacteria or other microorganisms. This can be done using a variety of methods, including microscopy, culture plates, and DNA sequencing.
14. Copper-plate some coins
Copper-plating coins is a great way to add a personal touch to your pocket change. This project is perfect for kids who are interested in science and chemistry.
First, clean your coins with the distilled water and dry them off. Next, cut the copper into small strips using scissors or wire cutters.
Attach one end of the copper strips to the positive terminal of the battery with an alligator clip.
Then, touch the other end of the copper strip to the negative terminal of the battery. Finally, dip your coins into the solution and wait a few minutes for them to turn green.
15. Stretch your mind with a flexibility
Too often, we get bogged down in the same old routines and fail to see the beauty and excitement that surrounds us everyday.
One way to combat this rut is to challenge your brain with new experiences. A great way to do this is through flexibility experiments.
Flexibility experiments are a fun way to explore the world around you while also growing your mental capacity. By their very nature, they force you to think outside the box and come up with new ways to approach problems. This makes them perfect for science class projects.
There are endless possibilities when it comes to flexibility experiments. You could try something as simple as seeing how long you can hold a handstand or how far you can stretch without moving your feet.
Or, you could get really creative and build a Rube Goldberg machine that accomplishes a simple task in the most complicated way possible.
No matter what you choose to do, flexing your mental muscle with a flexibility experiment is sure to be a fun and enlightening experience!
16. Extract DNA from an onion
There are many ways to extract DNA from an onion, but we will outline two of the most popular methods.
The first method is to cut the onion in half and then use a blender or other tool to blend it up into a liquid.
Once the onion is liquified, add some dish soap and stir. The dish soap will break down the cell walls of the onion and release the DNA.
Then, pour the mixture into a strainer to remove any solids. Finally, add some isopropyl alcohol to the liquid and gently swirl.
The DNA will precipitate out of solution and collect at the bottom of the container. You can then scoop it out with a spoon or pipette.
17. Explore how sugary drinks affect teeth
Sugary drinks are often high in acidity, which can lead to tooth enamel erosion.
In this experiment, students will investigate how sugary drinks affect teeth by placing eggshells in different types of sugary drinks and observing the changes over time.
Collect a few eggshells and clean them thoroughly. Allow them to dry completely. Fill three glasses with water and label them “control”. Add one eggshell to each glass.
Fill three other glasses with different sugary drinks and label them accordingly. Add one eggshell to each glass.
Observe the eggshells in the control group after 24 hours, 48 hours, and 72 hours. Record your observations in a table or chart.
Repeat step 4 for the eggshells in the sugary drink group. Compare your results between the two groups of eggshells!
18. Design your own slime
There are a ton of ways to make slime, but here is one way to design your own slime:
In a bowl, mix together the glue and water. Add food coloring, glitter, and any other desired add-ins to the bowl and mix together.
In a separate bowl, mix together 1/2 tsp borax powder with 1/4 cup water. Stir until the borax is dissolved. Pour the borax mixture into the glue mixture and stir until combined. The slime will start to form immediately.
Once everything is mixed together, knead the slime with your hands until it reaches the desired consistency. If it’s too sticky, add a bit more borax powder; if it’s too stiff, add a bit more water. And that’s it – you’ve made your very own slime!
19. Construct a water clock
Cut a small hole in the bottom of your container. The hole should be big enough to fit the end of your ruler or measuring tape. Fill your container with water. You can add food coloring to the water if you like.
Place the container on a flat surface and insert the ruler or measuring tape through the hole in the bottom. The end of the ruler or measuring tape should be touching the bottom of the container.
Use the permanent marker to mark where the water level is on the outside of the container. This will be your starting point. Wait 1 hour and then use the permanent marker to mark where the water level is again. This will be your ending point.
Measure the distance between your starting point and ending point. This is how much water has flowed out of your container in 1 hour!
20. Ride the wave (machine)
If you’re looking for an awesome science project, why not try riding the wave machine? This is a great project for anyone interested in physics or engineering, and it’s sure to be a hit with your classmates. Here’s what you’ll need to do to get started:
Build your own wave machine. You can find plenty of instructions online or in science textbooks. Experiment with different materials to see what works best. Some good options include cardboard, wood, foam, and plastic.
Once you have your machine built, test it out! See how high you can make the waves and how long they last. Make observations and take measurements throughout your experiment. Be sure to record all of your data so that you can analyze it later.
Present your findings in a detailed report or presentation. Include information on your design, testing process, results, and conclusions.
21. Purify water with charcoal
When it comes to Science projects, there are many different ways to purify water. One popular method is using charcoal. This experiment will show you how effective charcoal is at purifying water.
Pour the cup of water into the bowl. Add the activated charcoal to the water and stir. Place the coffee filter or cloth over the top of the bowl and allow the mixture to sit for 15 minutes.
After 15 minutes, remove the coffee filter or cloth and observe the filtered water. You should notice that it is much clearer than when you started!
22. Test PH using cabbage
First, you’ll need to gather your materials. You’ll need a head of cabbage, red wine vinegar, water, a glass jar or container, a measuring spoon, and pH strips. You’ll also need blue food coloring if you want to see the pH change color as it happens.
To start, cut the cabbage into small pieces and add it to the jar or container. Add equal parts red wine vinegar and water to the cabbage (1/2 cup each should be enough). If you’re using food coloring, add a few drops of blue food coloring to the mixture now.
Place the lid on the jar or container and give it a good shake until everything is mixed together well. Let the mixture sit for at least 24 hours so that the cabbage has time to release its natural pH indicator – this is what will show you how acidic or basic your solution is on the pH scale.
After 24 hours have passed, it’s time to test your solution! Take a pH strip and dip it into the liquid in the jar or container. Compare the color of the strip to the chart that came with your pH strips – this will tell you where your solution falls on the pH scale (acidic, neutral, or basic).
23. Burn calories to explore stored energy
To measure the amount of energy that is stored in various types of food, we will need to conduct an experiment. In this experiment, we will be burning calories to see how much energy is released.
Place the food item on the balance scale and weigh it. Record the weight in your data table. Place the food item on a heat-proof surface. Ignite it with a match and start the stopwatch or timer. Record the time in your data table.
Allow the food item to burn completely. Once it has burned out, weigh the ashes on the balance scale and record the weight in your data table. Calculate the amount of energy released by the food by subtracting the weight of the ashes from the original weight of the food item.
This will give you grams of lost weight due to combustion. Energy release is measured in kilojoules/kilocalories (kJ/kcal), so use your calculator to convert grams lost to kJ/kcal lost using this formula: kJ/kcal = 4184 x grams lost
24. Discover computer coding with LEGO bricks
Coding with LEGO bricks is a great way to introduce kids to the basics of computer programming. By following simple instructions, they can create programs that make their LEGO creations move and interact with each other. This is a great way to get kids interested in coding, and it’s also a lot of fun!
Coding with LEGO is a great way for kids to learn the basics of coding. By experimenting with different code blocks, they can learn how to create simple programs and games. Plus, it’s a lot of fun!
25. Marvel at a density rainbow
A density rainbow is a beautiful and easy way to learn about density! All you need is a clear container, some water, food coloring, and a few common household objects.
To make your density rainbow, start by filling the container with water. Add a few drops of food coloring to the water, and then carefully add your objects one at a time. Be sure to add them in order from heaviest to lightest!
Once all of your objects are in the water, take a step back and admire your handiwork. The different colors of the food coloring will show you which object is denser than the others. The heaviest object will be at the bottom of the container, while the lightest object will float on top!
Final Words
It’s finally time to wrap up this awesome blog post on ideas for class science projects! We hope you found some inspiration from our list and that your students have a blast with their chosen project. As always, be sure to consult your child’s teacher before starting any project to make sure it falls within the guidelines.
And there you have it! Our top ideas for class science projects. Did we miss any? Kindly let us know in the comments below.
We hope that this list of 25 awesome topic ideas for class 7 Science projects has given you some inspiration for your own project. Remember to choose a topic that interests you and that you can research thoroughly. Good luck!
 Cardiology
 Clinical Oncology